TUTORIAL: HOW TO UPGRADE THE YOGA EM-1 TIE CLIP/LAPEL MICROPHONE
If you're like me then you'll check your camera equipment every time before a film shoot. But no matter how many times you check your gear the unexpected can always happen, so make sure you're prepared and if you can, carry spares. The last thing you need is to be worrying about your equipment when you're on set.
In this blog post I'll be focusing on my wired lavalier microphones...
I have used these for over ten years and they've never given me any problems, they've definitely and literally been through the war zones. I have used them in interviews, hidden and concealed them in cars and they've even been strapped to headsets. Below are two interviews of the mics in use.
...There will be times (no fault of yours) that your equipment can and will malfunction. On one of my recent film shoots I had a problem with one of my lavalier mics, I was getting a lot of static/crackling sound which was sending my recording level and my ears sky high! This led me to make a few drastic changes to my wired lavalier mics.
The Yoga EM-1 Tie Clip/Lapel Microphone comes with a separate adaptor incorporated with a 1/4" mono jack (male) fitted with a 1.5V DC AAA battery adaptor to 3.5mm mono jack input (female) with a cable length of four metres.
I found there were just too many connections with the EM-1 and sometimes if the cable twisted it would create a static sound, this is not good! (I also realised it was the microphone cable that was causing problems too).LET'S GET STARTED
In this tutorial you're going to need:
Drill (electric/handheld)
Soldering Iron
Hack Saw
Flat Head Screwdriver
Clippers/Scissors
Wire Stripper
Insulation Tape
XLR (male) Connector
2 core Audio Cable
STEP 01
Using your drill and drill bit (roughly the same size as your microphone cable).
Very carefully drill a hole in this area remembering not to drill into any cables etc.
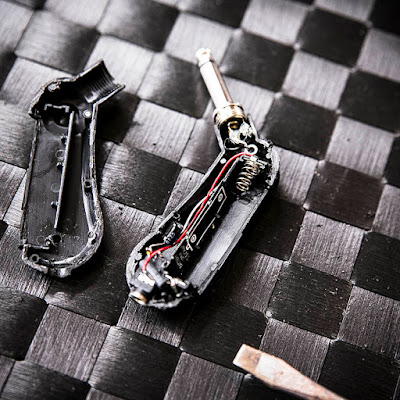
If you remove the battery cover, you will see a small gap inside (see picture below), that's where the hole needs to be. See point of drill bit below.
You can see the drill hole to the right of the adaptor in the image below.
STEP 02Using your hacksaw, gently saw into the these three areas until you feel the hacksaw blade break through the centre seam of the adaptor.
(AREA 1)
(AREA 2)
(AREA 3)
Use the flat head screwdriver to gently twist and prise the adaptor apart at the three areas 1,2 and 3.
(Note: The hole you drilled is on the side that has no circuit).
At this point make a note of the wire and circuit layout, I used my mobile phone to take a photo of the inside. Below: (Image of Yoga EM-1 with side missing and AAA battery in place).
[ADVERTISEMENT]
STEP 3
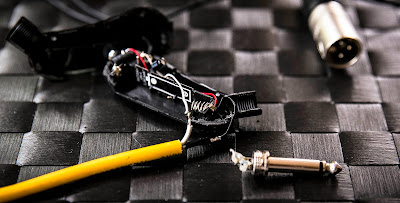
Remove the 1/4" mono jack by carefully clipping the black and white wires as close to the terminals as you can. Note the positive white cable (+) / negative black cable and solder the two core screened yellow cable to the correct terminals.
Below: Cable used for XLR connector.
Place the microphone cable through the hole in the panel and solder it to the female connector terminals.
Put a tie wrap between the panel and connector to prevent the cable from being broken inside if pulled.
Before putting everything back together again, test the mic to make sure that everything is working properly. Once you've tested the microphone in it's current open state, tape over any visible wires, tuck them away neatly and place the side panel (with the hole) back on.
I used the remnants of the cable sleeve to act as spacers to make sure they held the cable in place.
Then I used black insulation tape to lock it together tightly, see images below:
STEP 04
I used insulation tape to cover the seams where I used the hacksaw to make the slits in Step 2.
THE RESULT
I am now left with a more sturdy and professional looking mic on the left as compared to the original on the right. The XLR connector fits snug into my recorder and I feel confident that it's not going to twist or get pulled out.
These ideas are for anyone with a creative mind and I hope it helps and inspires you to try something different, as long as you have a little patience and understand what you're doing then you should have no problems.
I hope you've enjoyed reading my post, you can also check out my film page:
Thanks,
Edmahoo (Twitter)


Comments
Post a Comment